
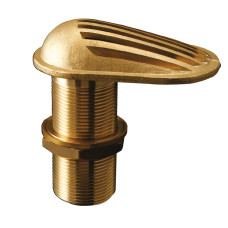
BRASS INTAKE SCOOP TRAINER
- Scooper 1″
- Scooper 1-1/4″
- Scooper 1-1/2
- Scooper 2″
Description
BRASS INTAKE SCOOP STRAINER
- Scooper 1″
- Scooper 1-1/4″
- Scooper 1-1/2
- Scooper 2″
Brass Intake Scoop Strainer Installation Instruction on Boat
Installing a brass intake scoop on a boat hull is a critical task for ensuring proper water intake for systems like engine cooling, live wells, or washdowns. Here’s a step-by-step guide to help you install it safely and effectively:
🔧 Tools & Materials Needed:
-
Brass intake scoop (also called a scoop strainer)
-
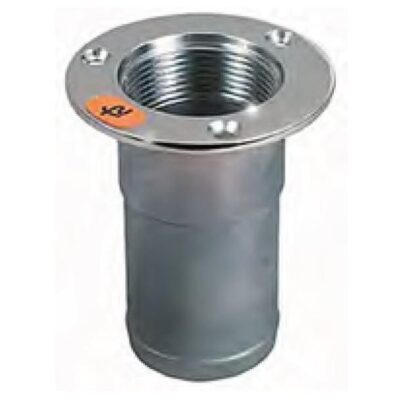
Marine-grade thru-hull fitting (usually bronze or brass)
-
Marine sealant (e.g., 3M 5200 or 4200)
-
Hole saw and drill
-
Wrench set
-
Screwdriver
-
Sandpaper or abrasive pad
-
Safety gear (gloves, goggles)
Installation Steps:
1. Choose the Location
-
Pick a flat, smooth part of the hull below the waterline.
-
Avoid areas near hull strakes, steps, or turbulence-prone zones.
-
Ensure interior access for installing and maintaining the fitting.
2. Mark & Drill
-
From inside the hull, mark the center of the desired intake location.
-
Drill a small pilot hole from the inside out.
-
From the outside of the hull, use a hole saw sized to your thru-hull fitting and drill outward through the hull.
3. Prepare the Surface
-
Lightly sand the hull area around the hole to help the sealant bond.
-
Clean thoroughly to remove dust and oil.
4. Apply Marine Sealant
-
Apply a generous bead of marine sealant to the flange of the thru-hull fitting.
-
Insert the fitting from the outside, so the threaded end enters the hull interior.
5. Tighten the Thru-Hull
-
Inside the hull, install the backing nut and washer (if included).
-
Tighten securely using a wrench, but don’t overtighten to avoid hull damage.
-
Wipe away excess sealant.
6. Install the Brass Scoop
-
Align the brass scoop strainer over the thru-hull on the outside of the hull.
-
Ensure the open end faces aft (toward the stern) to reduce drag and avoid pressure buildup underway.
-
Drill pilot holes for the screws using the mounting holes on the scoop as a template.
-
Apply marine sealant to the scoop’s base and screws.
-
Fasten the scoop with marine-grade screws.
7. Cure & Check
-
Let the sealant cure per the manufacturer’s instructions (usually 24–48 hours).
-
Inspect from inside and outside for leaks after the boat is launched.
Why Choose Us?
-
Extensive Selection: From stainless steel fittings to modern electronics, we stock a wide range of parts for every kind of boat and budget.
-
Marine-Grade Quality: Our products are built to withstand the harshest marine environments, ensuring performance and longevity.
-
Expert Advice: Our team includes experienced boaters and marine technicians ready to help you make the right choice for your vessel.
-
Fast & Reliable Shipping: Get the parts you need, when you need them—thanks to our streamlined logistics and dependable delivery partners.
-
Customer Satisfaction: We pride ourselves on exceptional customer service, backed by hundreds of positive reviews and returning clients.
-
Competitive Prices: Get the best value without compromising on quality.
Related products
-
- Bilge Pumps, Thru Hull Fittings
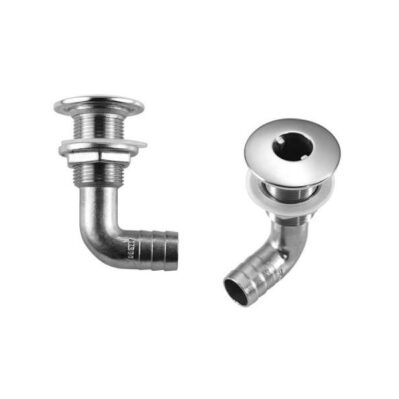
Thru hull SS 90 deg. 3/4″ hose ID
- Price range: 150,00 د.إ through 190,00 د.إ
- Select options This product has multiple variants. The options may be chosen on the product page

Reviews
There are no reviews yet.